


Making an Aquarium Filter
Tools you will need:
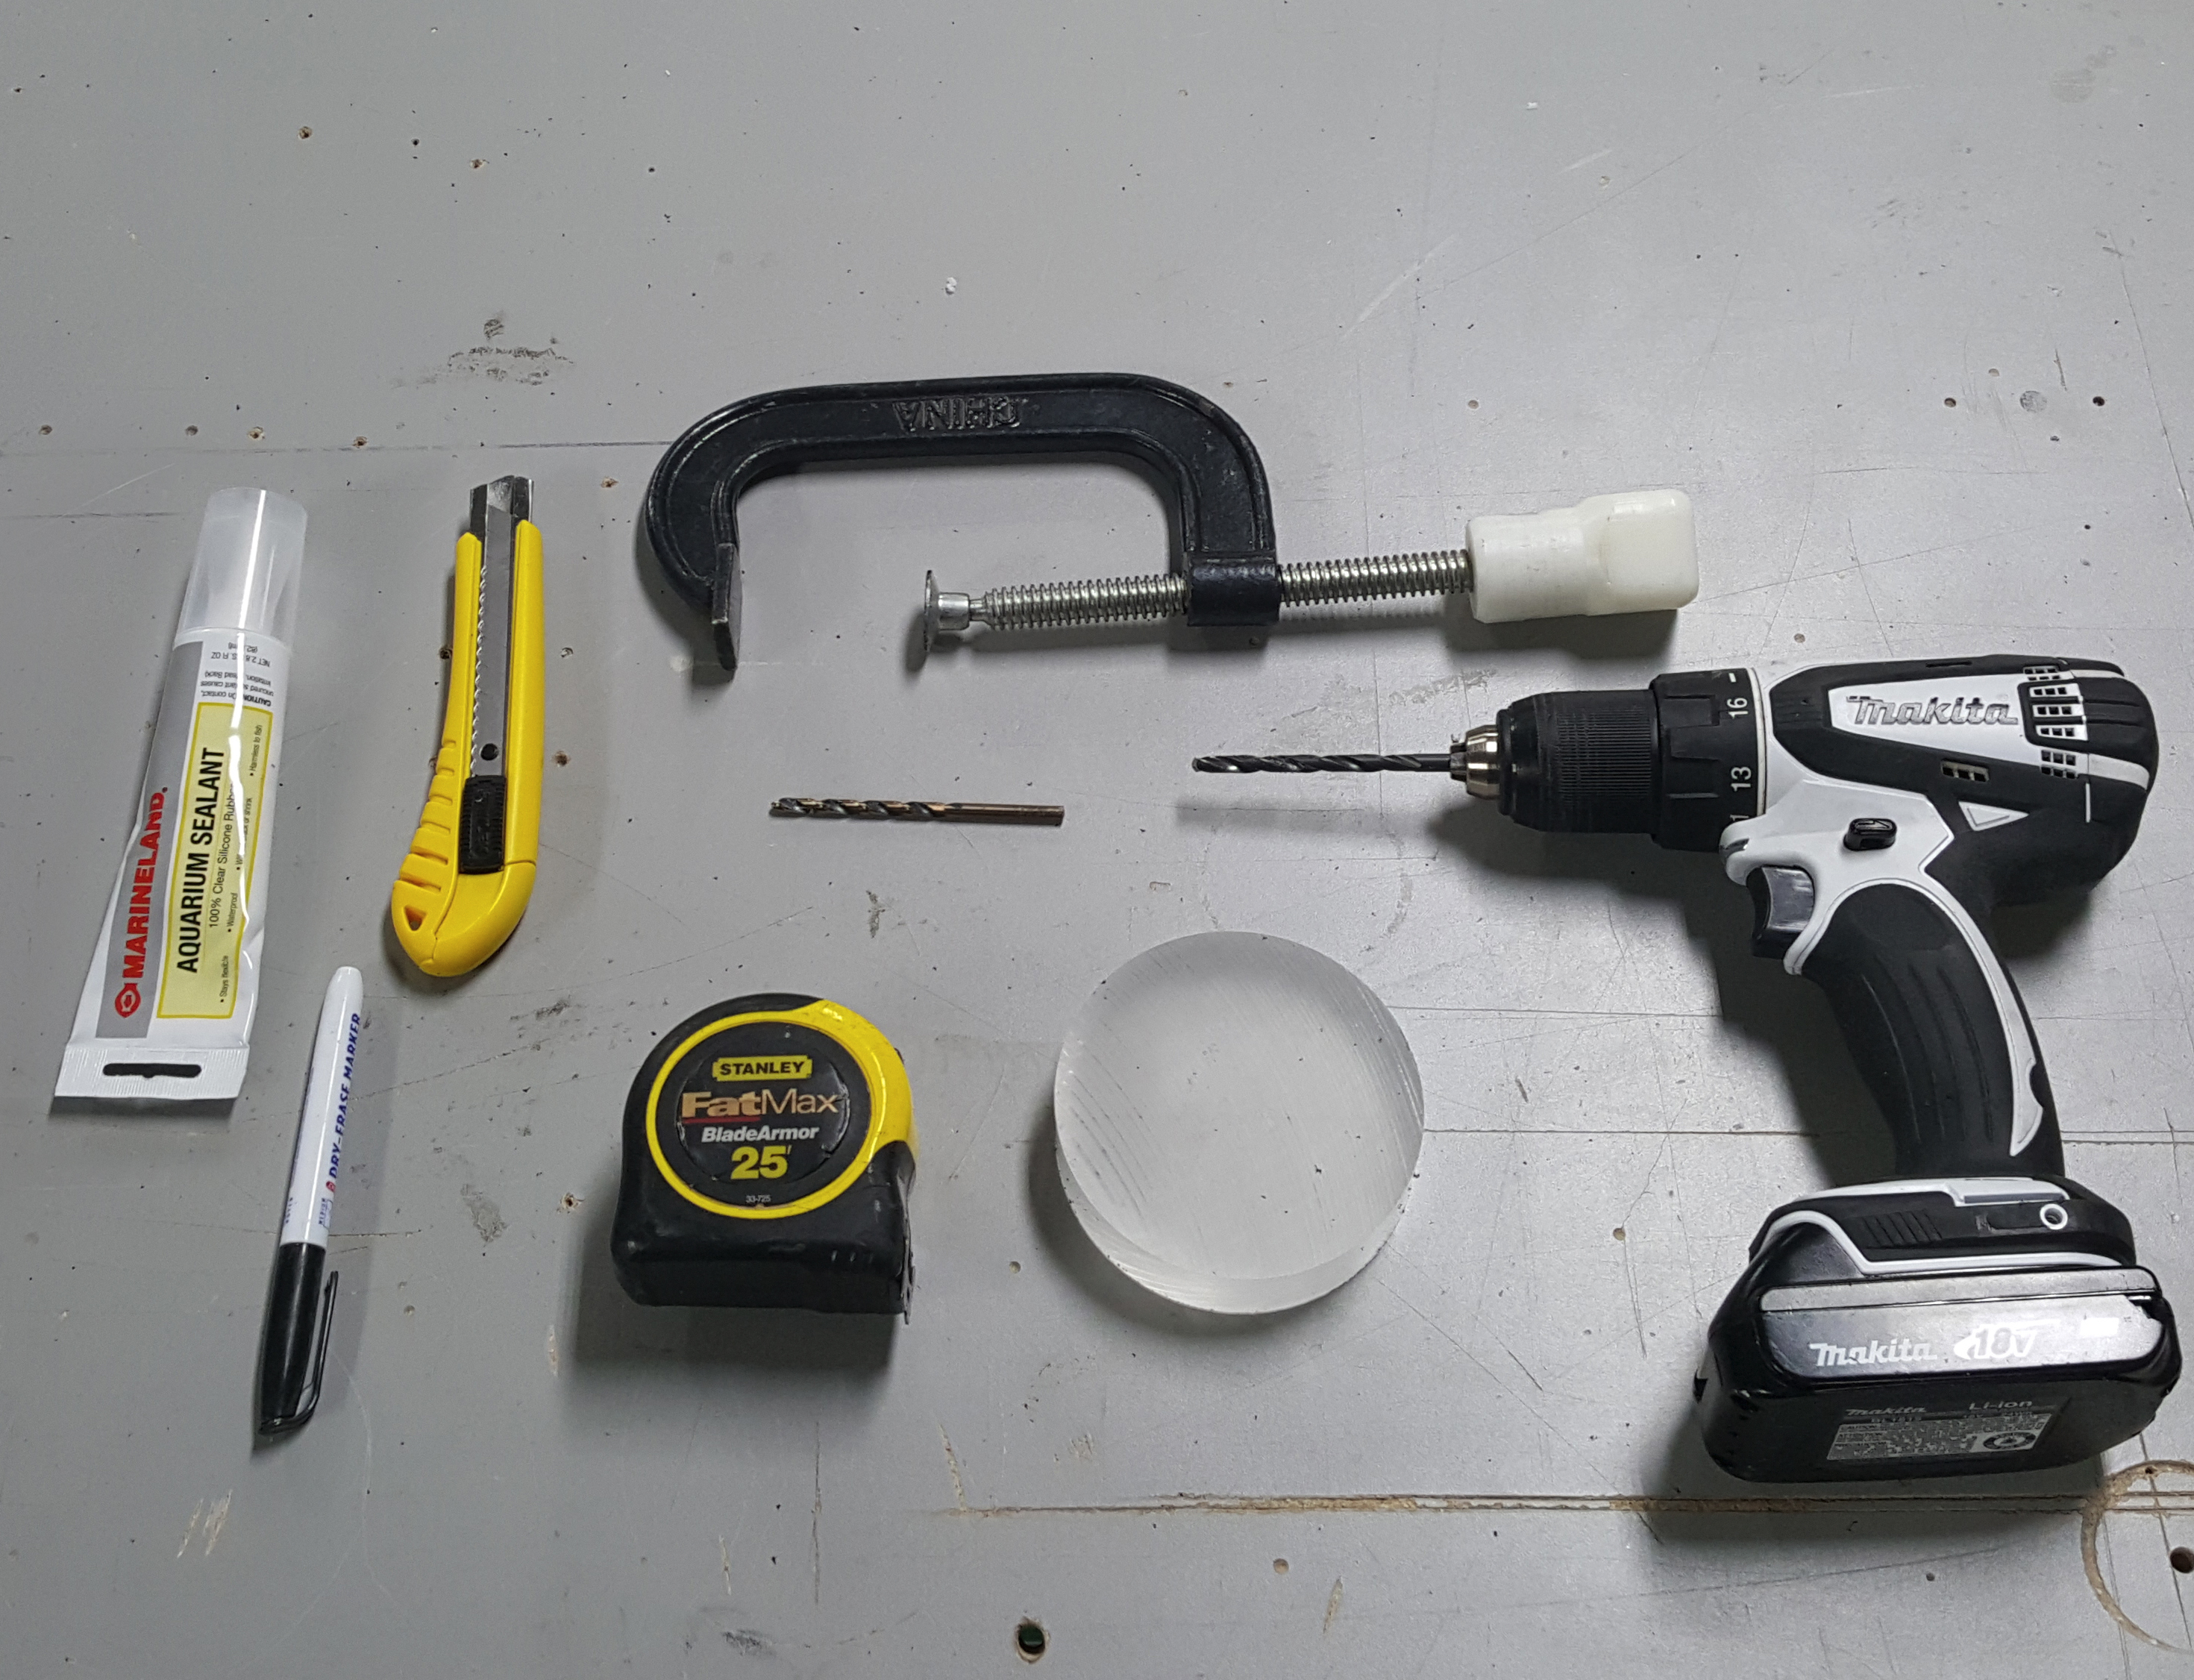
- Measuring tape
- Utility Knife
- Drill
- 1/8'' Drill Bit
- .22'' Drill Bit
- Utility Knife
- C-Clamp
- Dry Erase Marker
- Circular Disk (cutting template)
Materials you will need:
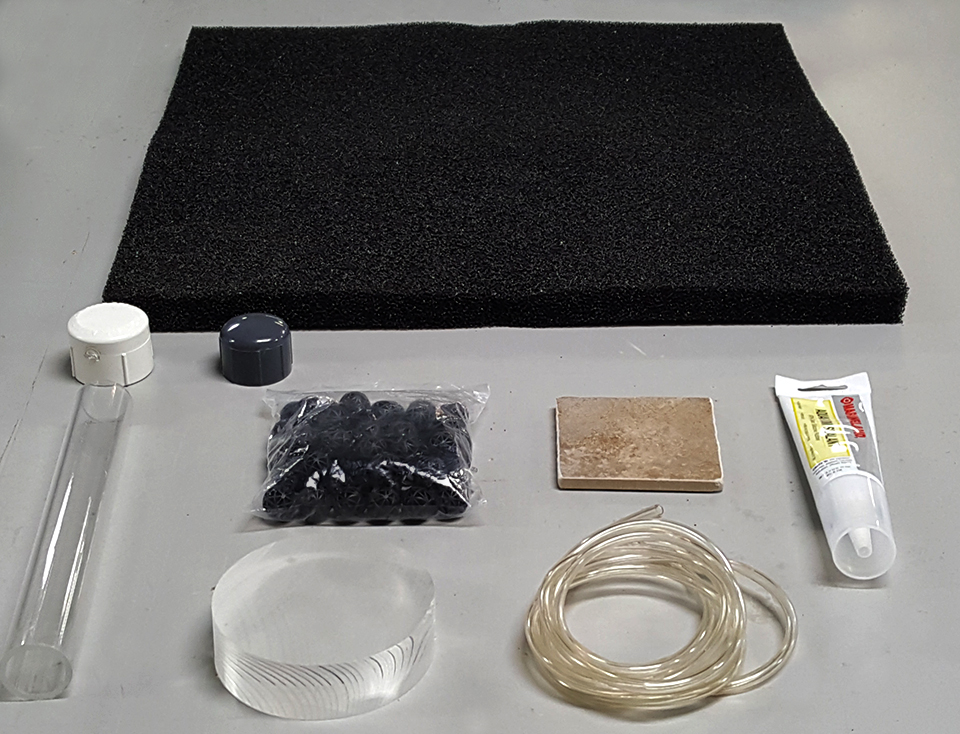
- 2 x 3/4'' PVC caps (one with a flat bottom)
- 1 x 1' Length of acrylic tube
- 1 x Circular cutting template (we used an acrylic disc)
- 1x Chunk of tile or aquarium safe weight
- 1/4'' OD Aquarium tubing
- Aquarium safe caulking
- Filtration foam (ours was $6 from Amazon)
- Bio balls ($4 a bag from Amazon)
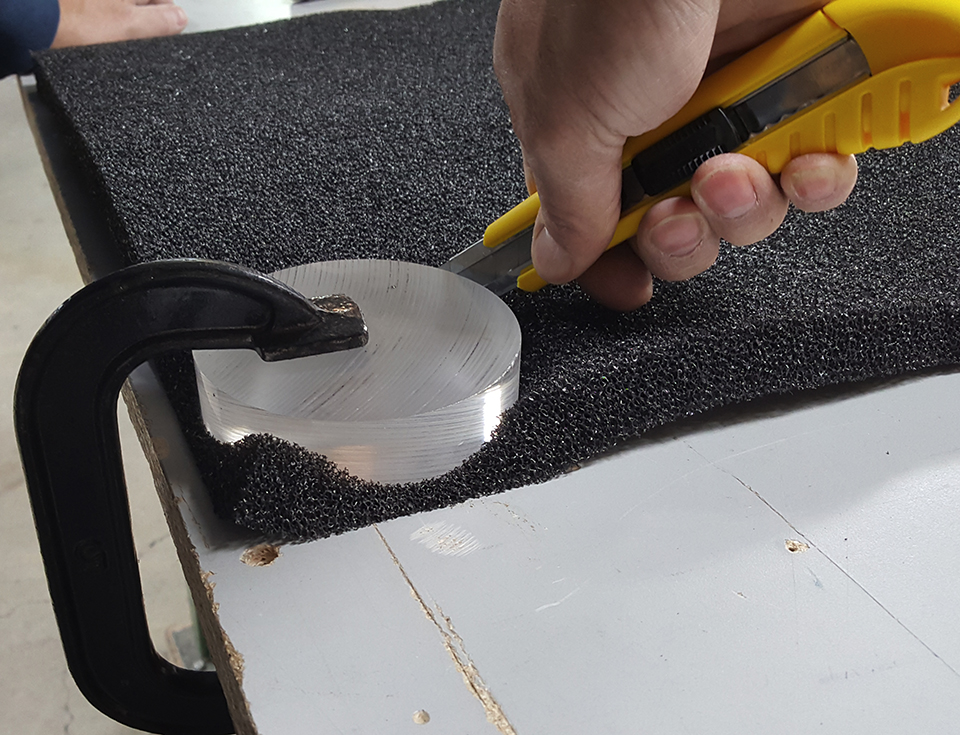 Begin by clamping or pressing down your cutting template onto the foam. Cut four circles the same way.
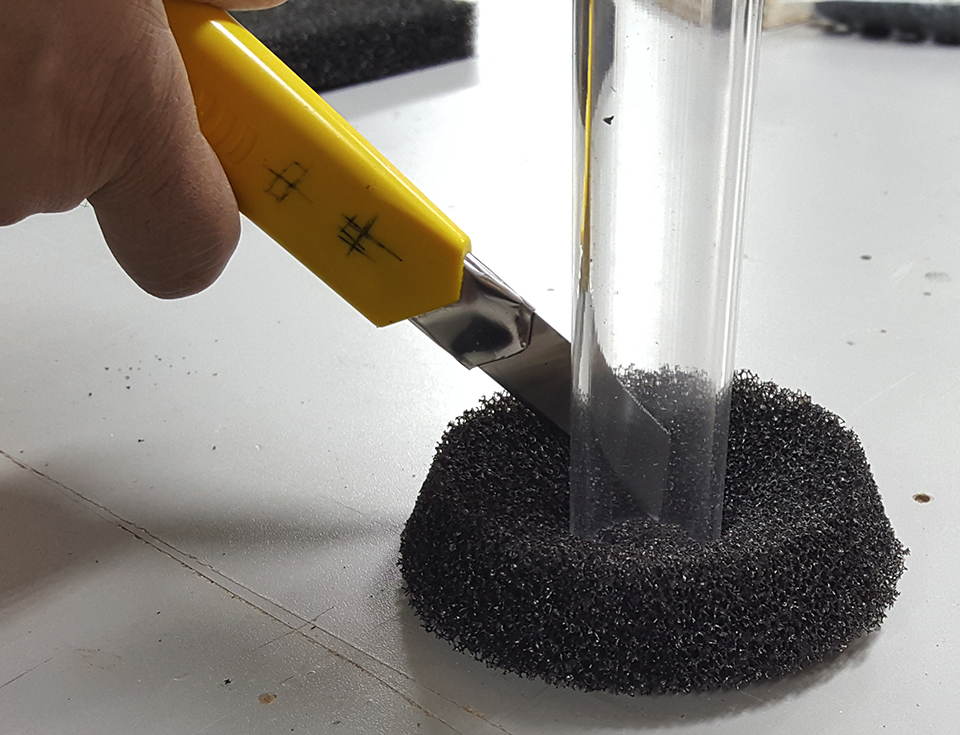 Once the foam disks are cut out, grab your length of tube. Use the tube as a cutting template to create the hole in the center of the foam disks. Repeat this for all foam disks.
 Slide the flat PVC cap over the tube. Measure 1/2'' from the top of the cap and draw a rough ring around the tune. Continue marking in 1'' intervals until your have 4 ring total.
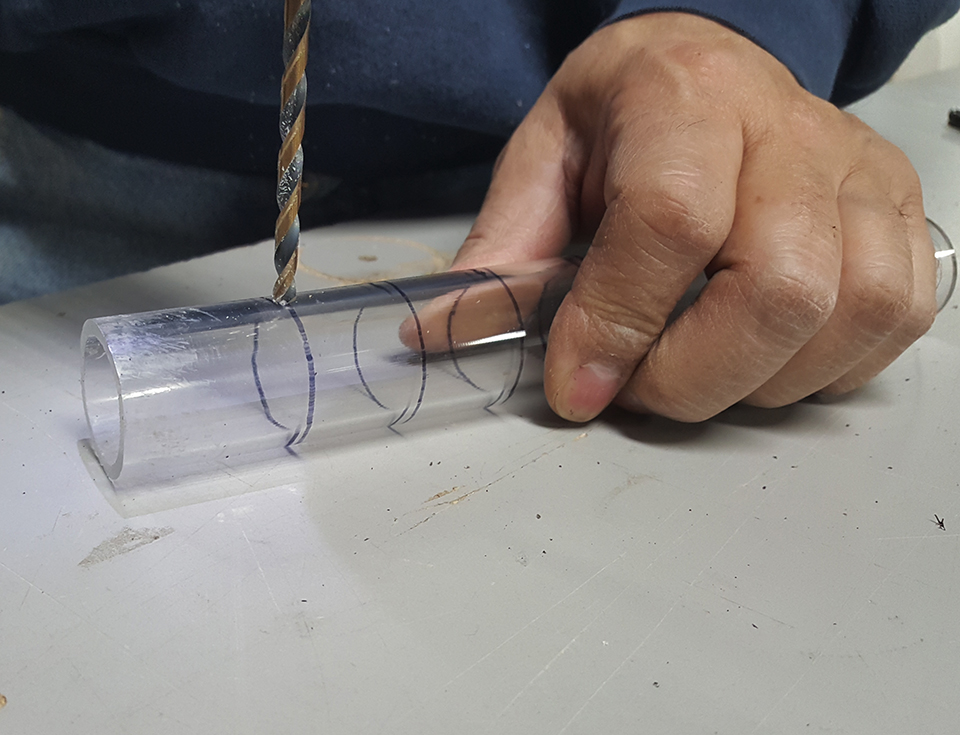 Using the lines you marked as a guide, drill about 5 1/8'' intake holes along each line. Try to keep the holes evenly spaced, it isn't crucial to the function of the filter, it just looks neater
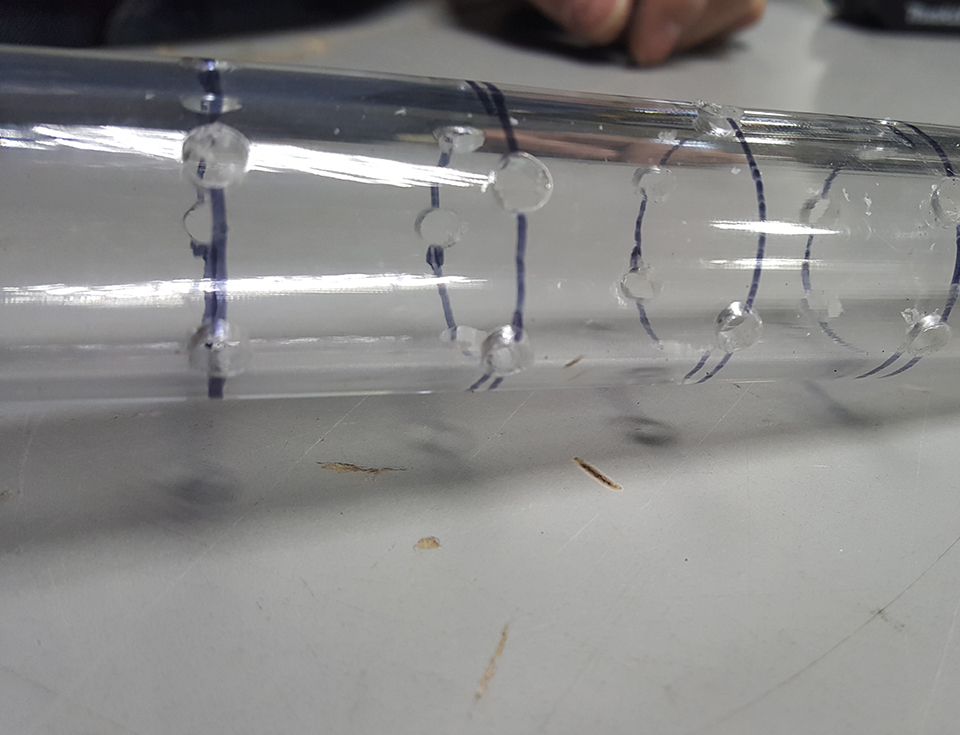 Your tube should now roughly resemble ours.
 Put the .22'' drill bit in your drill and grab your flat PVC cap. Hold tightly onto the cap while you drill a hole close to the top of the inside of the cap.
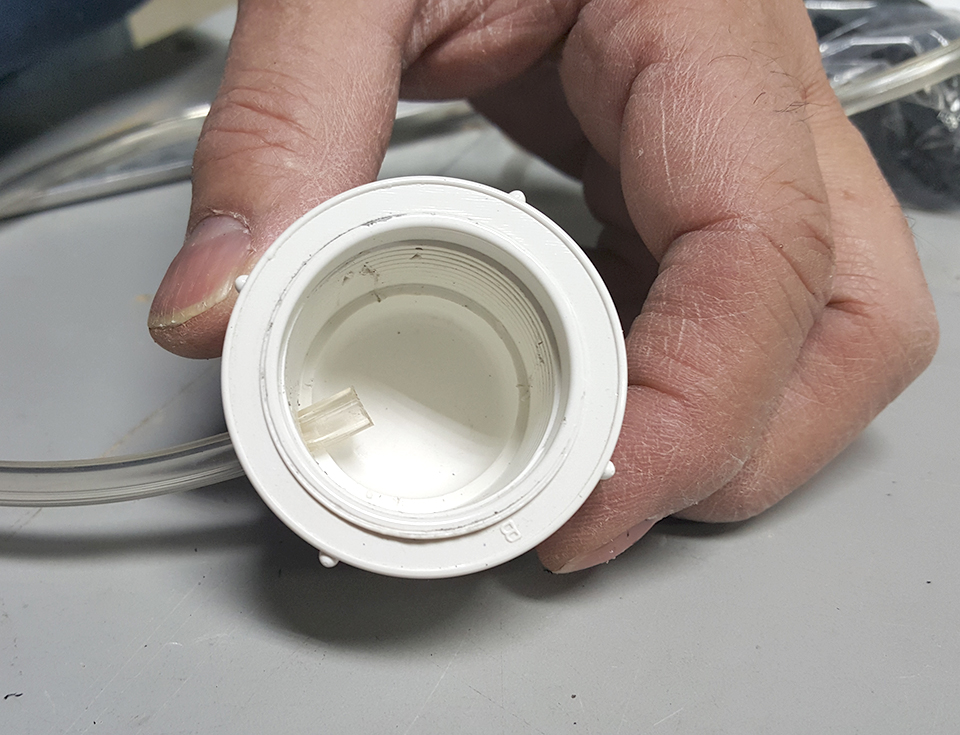 Insert one end of your tubing into the hole you just made in the cap. It will be a tight fit.
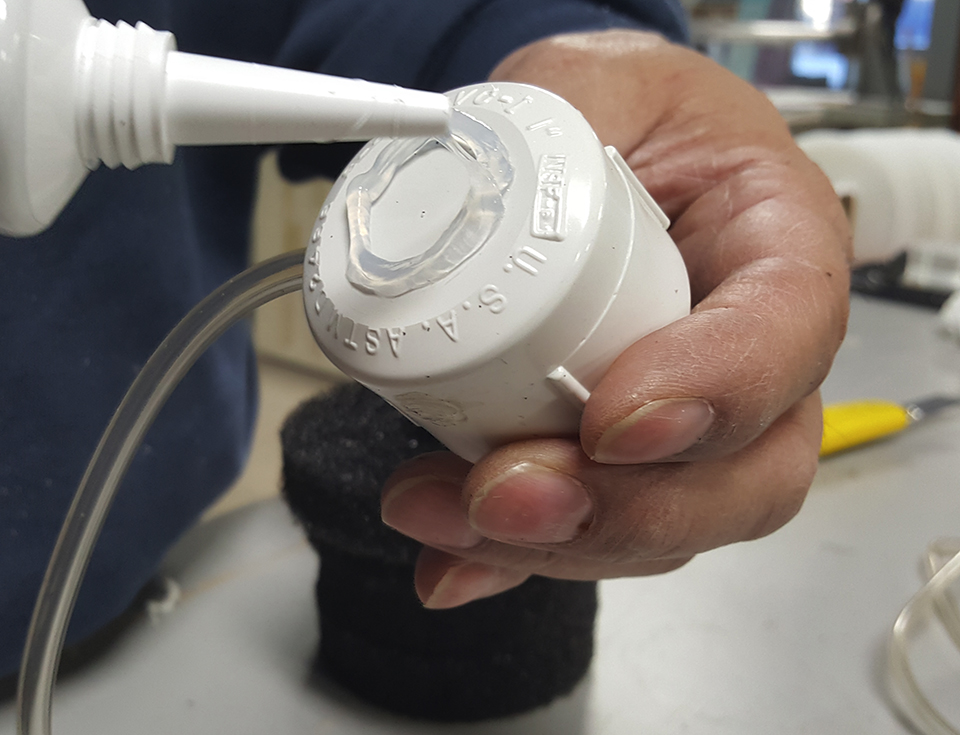 Have your piece of tile ready on the table. Flip over the cap and put some caulking on the flat side of it. Once you're happy with amount of caulking on the cap, press it down on the tile
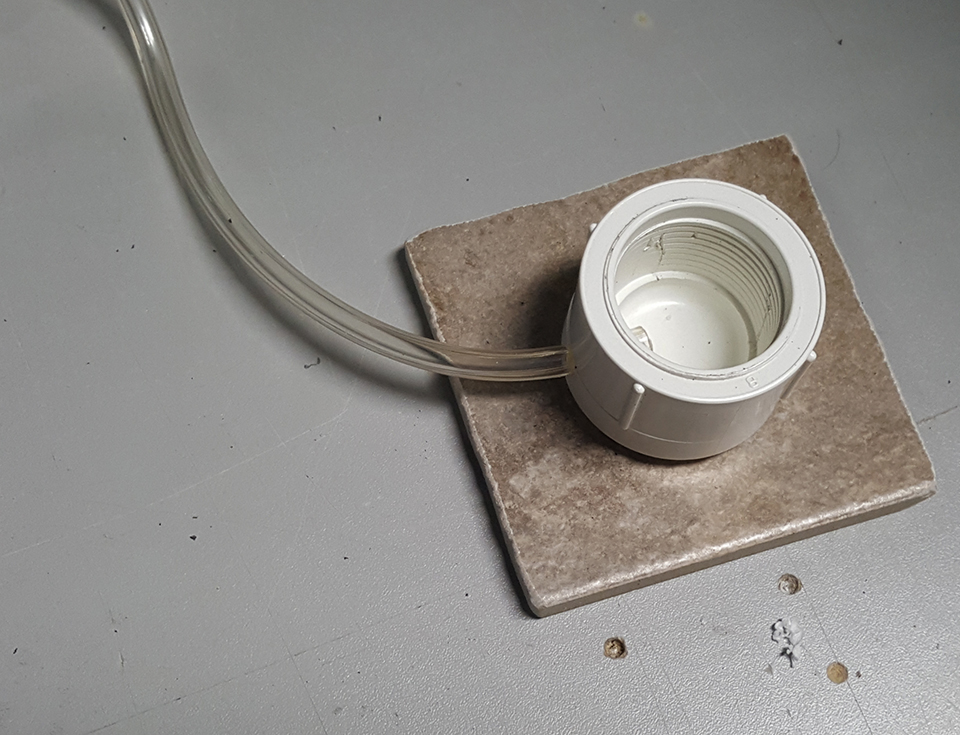 This is what your base should look like now. Let it sit until it's fully cured. The cure time should be printed on the caulking tube.
 Take your other PVC cap and, using your 1/4'' bit, drill some exhaust holes. 5 holes worked perfectly for us.
 Once the base has cured, you can begin assembling the filter. Insert the tube into the cap intake side down.
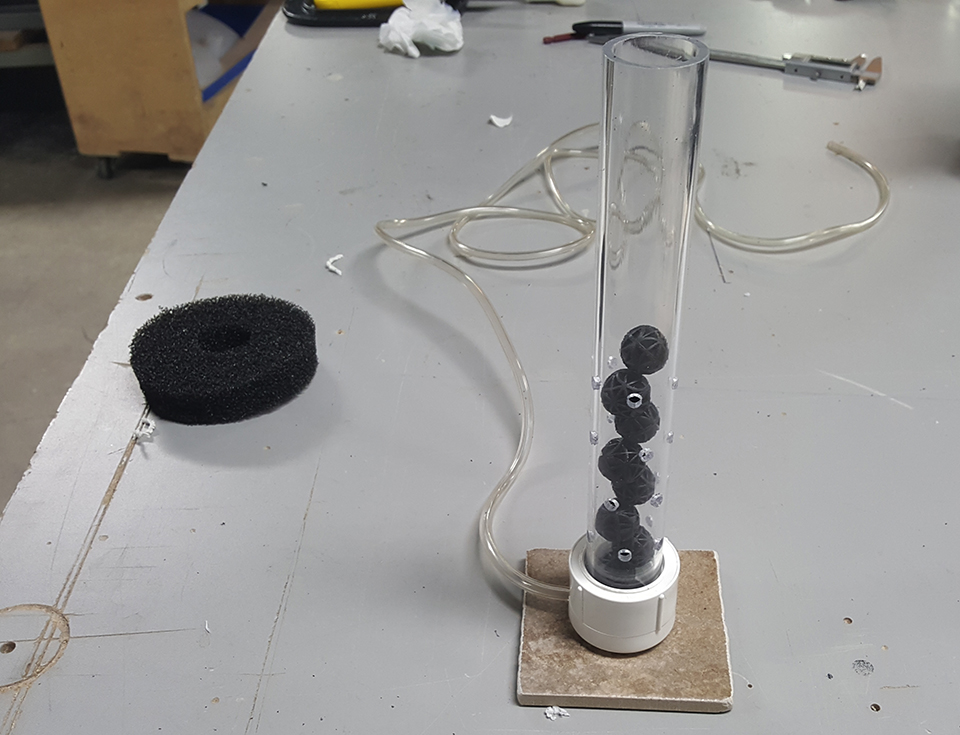 Put some of the bio balls in the tube, this filter is able to be disassembled so you can use trial and error to decide how many bio balls you want.
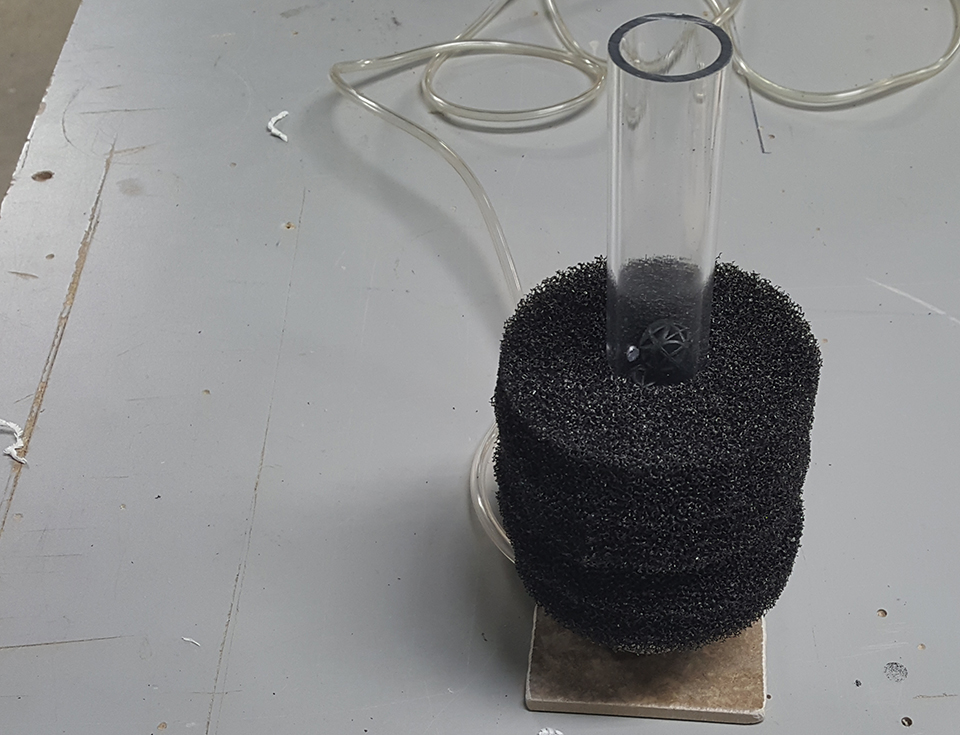 Slide the foam filter rings over the acrylic tube covering the intake holes.
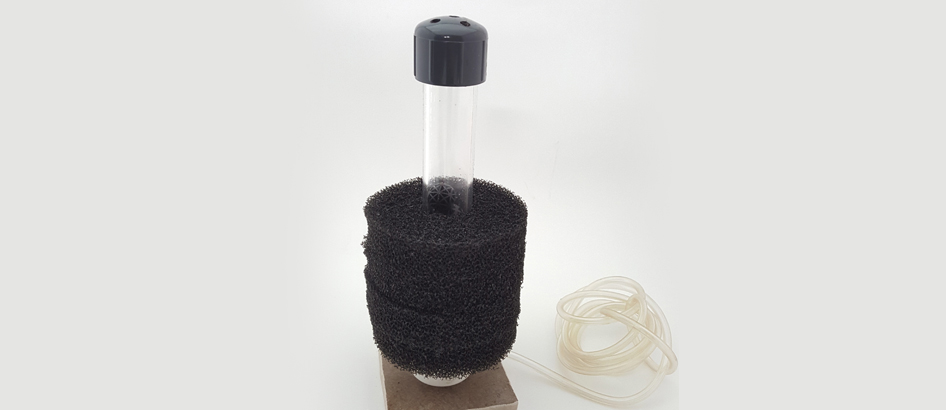
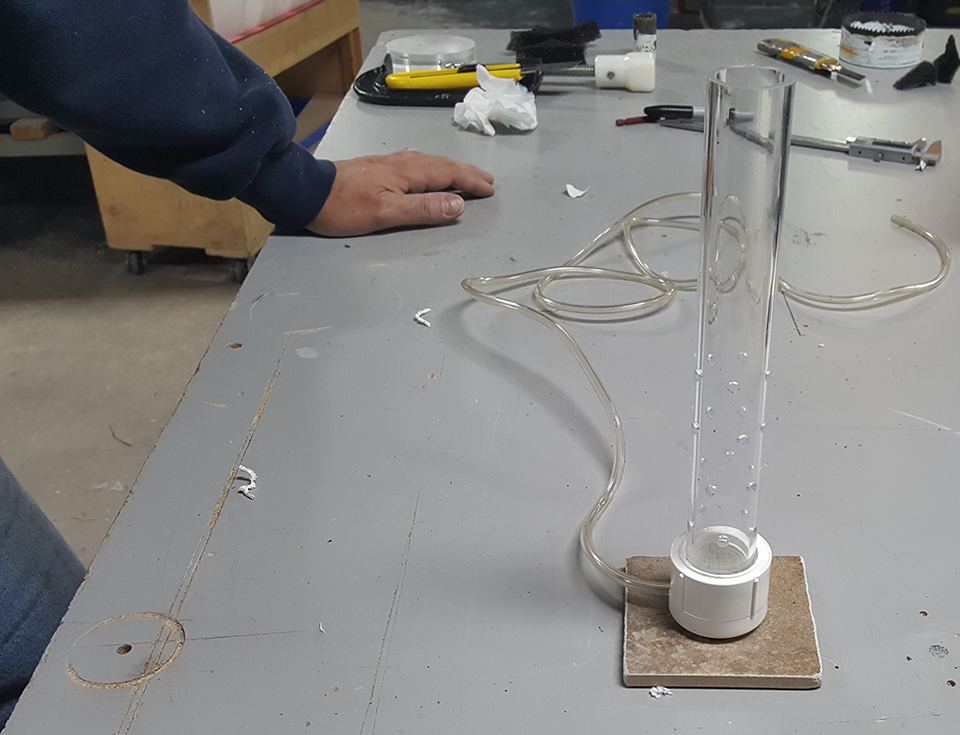
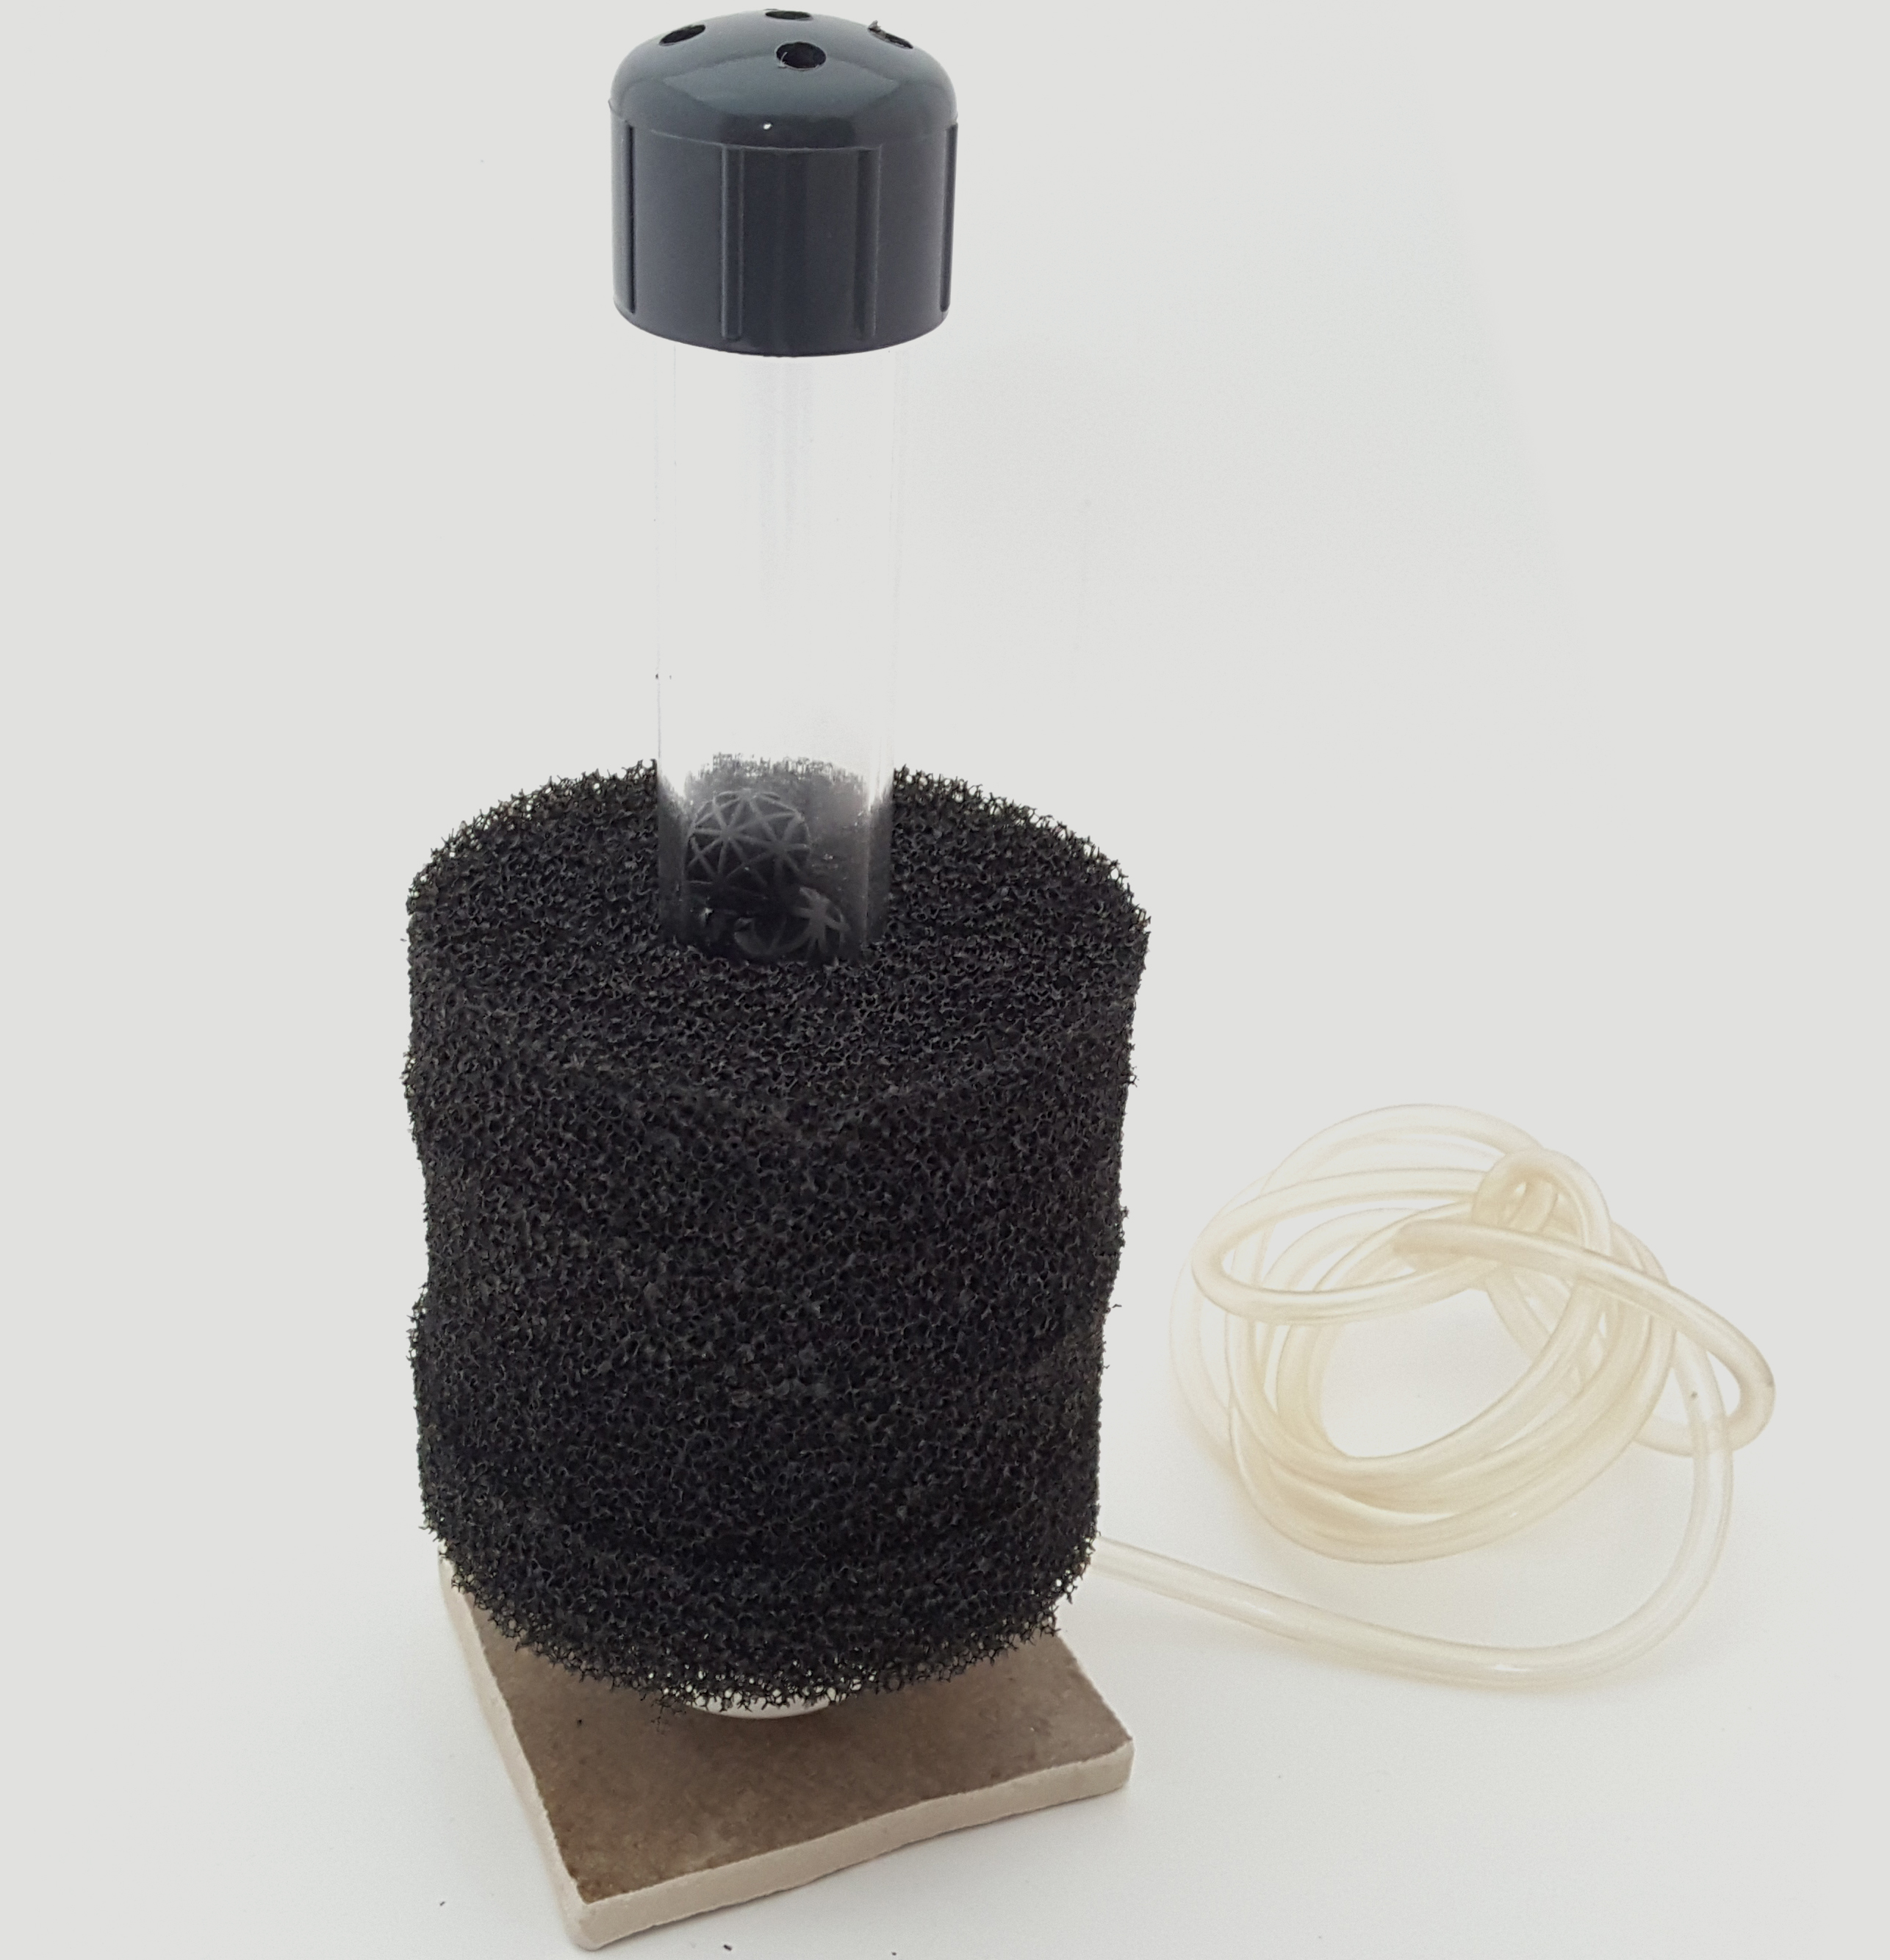 You can now place the top cap. The filter system is complete and ready for testing.
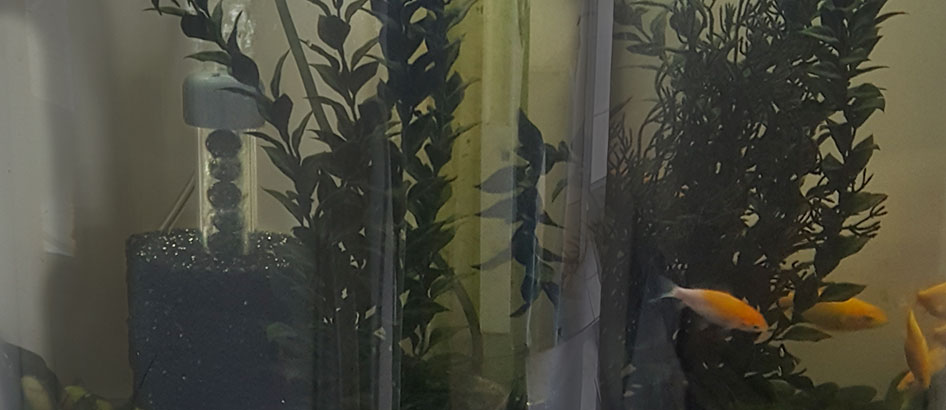
Here's the tank filter in action! Our tank filter is a simple, quick and cheap DIY project that will benefit your aquarium.