


Making a lightbox with PVC pipe and fittings
Having the perfect picture is important when it comes to all sorts of things these days. When you’re choosing a Facebook profile picture, sending photos to your loved ones and most importantly in our case, selling products online. E-Store owners and online shoppers alike can understand the importance of having clear, descriptive photos on each product they view.
The first step in obtaining a well composed product photo is photographing your product in a controlled environment. Photographers use a tool called a Light box for this. A lightbox is a box with an open side that you place an item in to get crisp, consistent photos. The walls of a light box are made from a white material (we used white linen cloth) that aids in light distribution and helps eliminate shadows. Outside the linen walls is a light source, usually an adjustable table lamp.
Since we needed a lightbox to shoot our products and we are also big on DIY projects, we decided to make a lightbox out of the PVC parts we sell. We have all sorts of tools at our disposal in the shop, but we made this tutorial assuming we had only the basic tools required for such a project. This project requires cementing PVC pipe to PVC fittings. While we aren’t putting any liquid through the “piping system”, we wanted to use best practices when cementing the joints. In piping systems, a square cut pipe end always works best so we begin with a Miter Box.
There are many specialty pipe cutting tools you could use to make this go faster and easier. Let’s just keep in mind this tutorial was written assuming you don’t own or have access to these specialty tools.
Creating the Miter Box
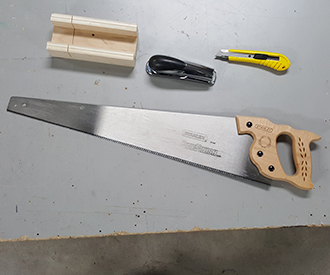
Tools you will need:
- measuring tape
- wood glue
- two adjustable clamps
- a hand saw
 The purpose of a miter box is to guide a handsaw to make consistent precise cuts.
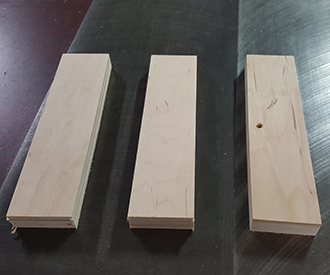
For our miter box we started with three peices. We used some scrap ¾’’ thick plywood cut into 8’’ long by 2’’ wide pieces.
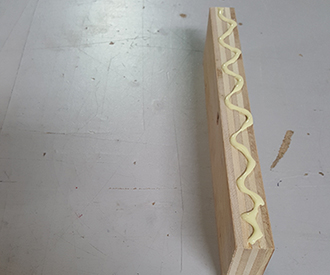 After you make your cuts, it’s time to begin assembling. Put some wood glue on the piece that will be the bottom of your miter box. Now line up the bottom edge of your side piece to the glued edge and press the pieces together.
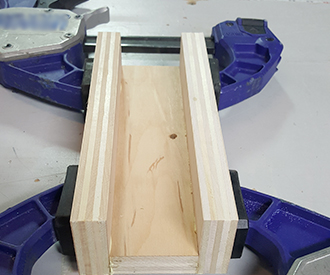 Repeat the same process to the other side. After the second side is glued on, put some clamps on the box. If you don’t have clamps just turn the box on its side and throw some weights on top. The glue we used recommends 25 minutes to set, we only waited about 5. Regardless of the amount of time you waited, once the glue is set you can move on to the next step.
 Because we are only using basic hand tools here and we need a true cut, we had to get clever. We used two more pieces of scrap ¾’’ thick plywood and cut them about two inches higher than our side pieces, we will call these “guide pieces”. The crucial part here is that the guide pieces are the same length.
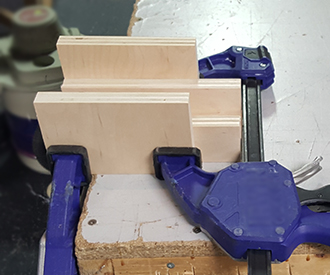 Clamp on the two guide pieces to either side of the box, being sure the edges line up. We will use the front edge as a guide to cut into our miter box as straight as possible.
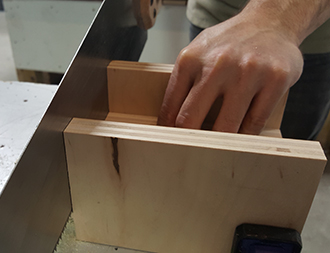 Clamp your box to the side of a table and begin cutting into the miter box. Making sure to keep the saw flat against your guide pieces.
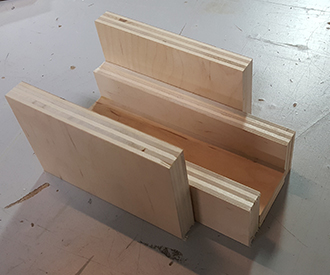
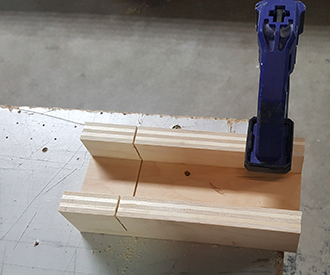 Cut all the way down and about 1/8th of an inch into the bottom piece. Your miter box is now complete and you can now make precise straight cuts.
Creating the Lightbox
Depending on the subject matter you are photographing you might have different requirements for your lightbox. In our case we needed to be able to collapse the lightbox when needed for storage, the lightbox to be about 2’ square, the ability to change the fabric walls to let different amounts of light in.
Tools you will need:
- Miter Box
- Hand saw
- Utility Knife
- Stapler
Material you will need:
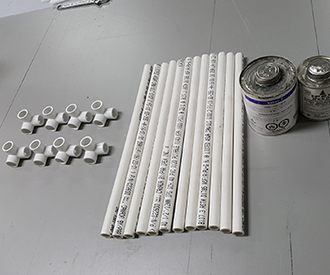
- 12 equal pieces of .5’’ white schedule 40 pipe (in our case 18’’ lengths)
- 8 .5’’ white schedule 40 side outlet elbows
- PVC primer and PVC Cement
- White fabric (we bought 2 yards of white linen cloth but you could use anything, a cheap and effective option would be a white bed sheet)
- Enough Velcro to cover approximately half of your pipe length.
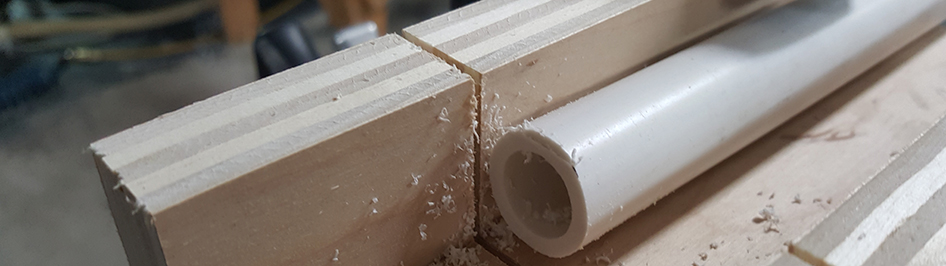
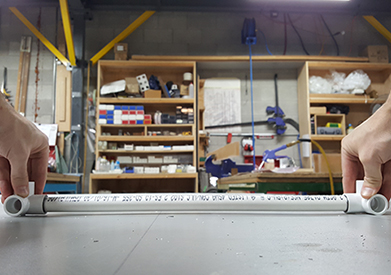
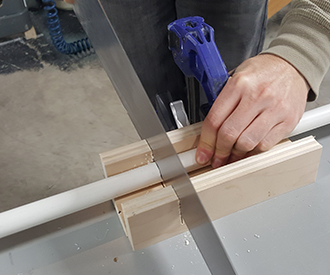 You are going to begin by cutting the PVC pipe to size. Using a measuring tape, mark the length you chose to fit the needs of your light box. In our case, we marked 18’’. Once your pipe is marked, put it into your miter box. Next, line up your cut mark and the guide-cut in the box. Holding the pipe firmly against the back of your miter box, cut through the pipe using the guide-cut in your miter box.
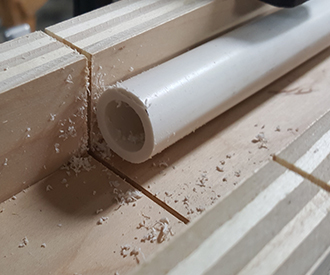 When your cut is complete you will notice burrs on the edge of your pipe. In PVC piping systems, these burrs can contribute to leaky joints. It is important (at least in fluid process systems) to get rid of these burrs.
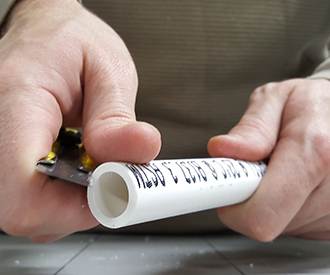 You can use the edge of a utility knife to de-burr the pipe, just be careful when working closely with utility knives.
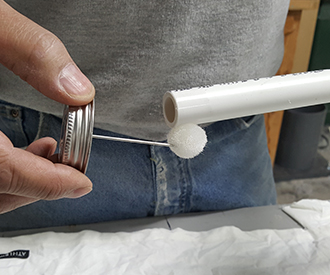 Assuming you still have all your fingers, it’s time to do some cementing. Grab one of your lengths of apply some PVC primer to the tip about one inch down all the way around.
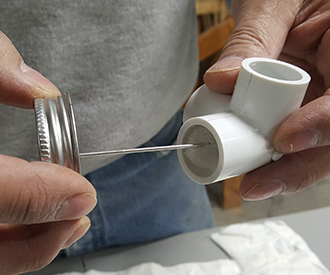 Do the same for one socket opening on one of your side outlet elbows.
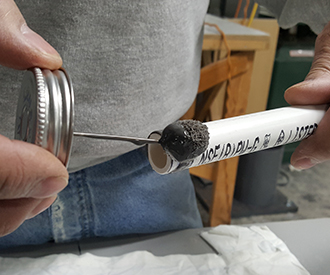 The next step is to apply the cement. Take the primed side of your PVC pipe and apply a thin coating of PVC cement about ¾ of an inch down and all the way around. Set the pipe down with the cemented edge hanging over your table.
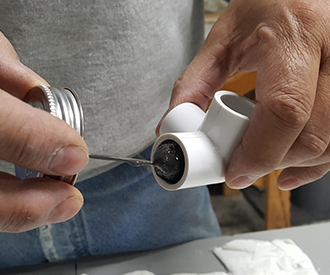 You must be quick at this point as PVC cement dries quickly. Grab the side outlet elbow and (on the same side you’ve primed) apply a thin coat of PVC cement to the inside walls.
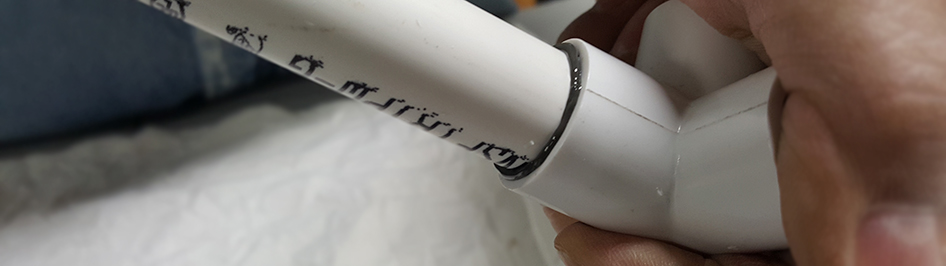
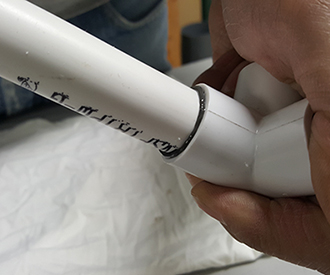 With the elbow, still in your hand, grab the pipe and insert the cemented side into the cemented side of the fitting. Using a twisting motion, push the pipe all the way into the fitting until you feel it hit the inside wall.
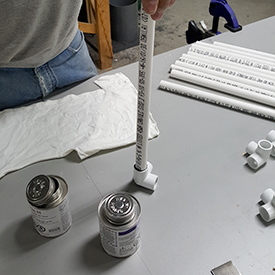 With the fitting side of the pipe on the table, push the pipe down and hold it there for about 30 seconds.
Complete the same steps to the other side of this piece, making sure the socket openings are facing the same way.
 The important part here is that you need to make sure the fittings are close to symmetrical. Once the fitting is pushed onto the pipe, place the parts on the table and rotate the freshly cemented fitting until it closely resembles the opposite one. Repeat the previous two steps three more times and make a total of four of the same pipe/fitting combos.
 Take one of the pipe/fitting combo parts and, using the same cementing process, cement another length of pipe into the socket of your choice. Do this two times creating two L shaped combos
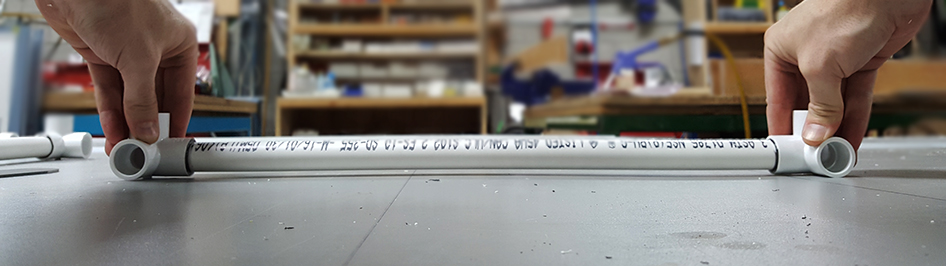
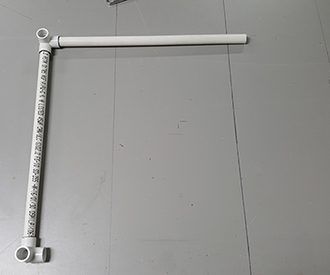
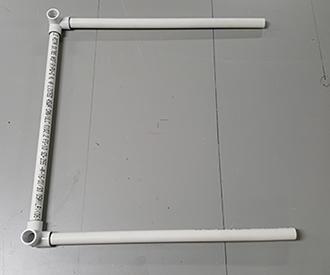 Rinse and repeat, making sure you cement the pipe into the correct socket. Creating two C-shaped parts.
 Now we will make our base square. Grab another pipe/fitting combo and prime the sockets. Set one of the C-shaped parts up so the ends of the pipe are hanging off the table and prime them as well. Next, grab your cement and apply to the correct two sockets. Apply PVC cement your pipe ends as well. Insert the fittings onto the pipe ends, flip your new square so the fresh cement is on the bottom. Press and hold for about thirty seconds. Repeat this step once more. Once you have your square pipe/fitting combos, you can move on to the next step.
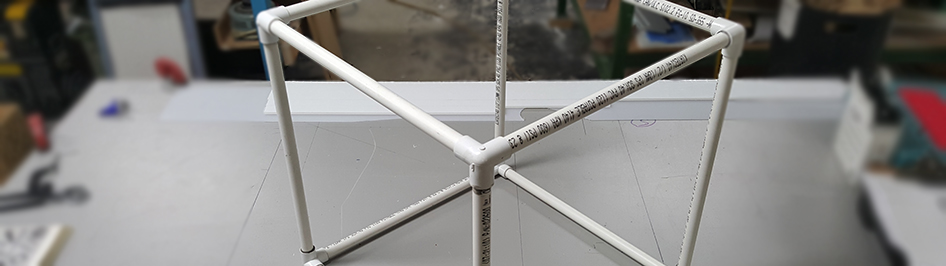
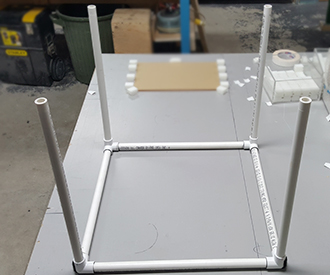 To make this box collapsible, we did not cement the last four pieces of pipe. This allows us to almost fully disassemble the box when needed. Once the skeleton of your lightbox is created we need to attach our cloth material. Now you just need to slide the second square shape onto the pipes that are now sticking straight up.
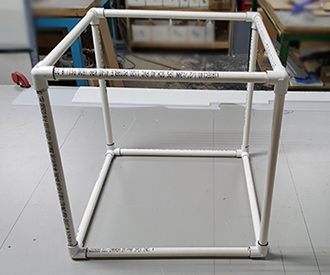 That’s it, you’re the “skeleton” of your box is complete.
Applying the Cloth
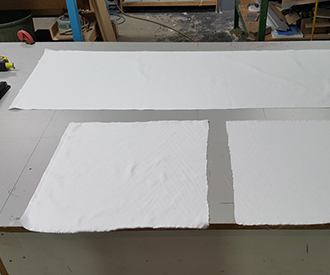 Begin by rough cutting your material. One piece will cover the top of the box and another piece will cover two sides and the back of the box. Leave about an inch of extra material for each side, we can clean it up after.
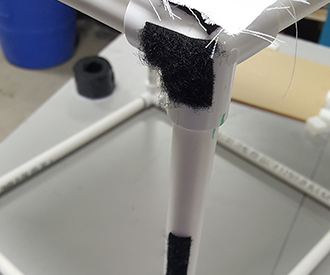
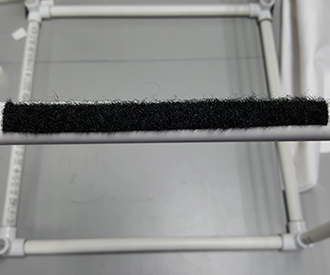 Next, cut four pieces of Velcro about 9’’ x .5’’ and four pieces at around 1’’x1’’. Place fuzzy side of one of the longer pieces of Velcro on top of the PVC pipe, somewhere close to center. Repeat for all sides.
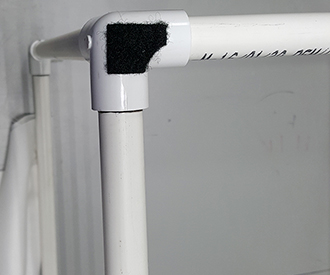 Now place the smaller fuzzy pieces of Velcro on top of the elbow fitting. Again, positioning is not crucial, somewhere close to the center is fine.
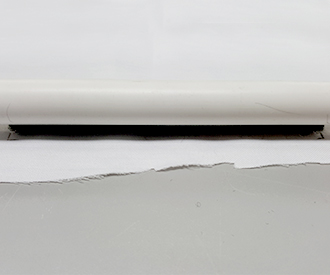 To position the Velcro on the cloth, we flipped over the box and placed it on top of the cloth. Draw a pencil mark onto the cloth on either side of the Velcro. Do this for all eight pieces of Velcro. This will guide you when applying the Velcro to the cloth.
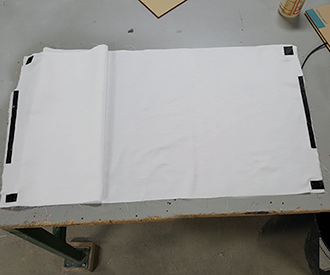
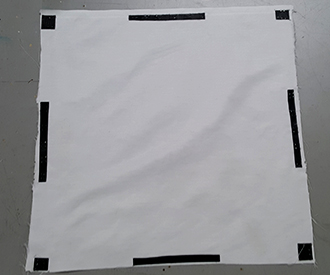 Apply the rough/hooked side of the Velcro onto the linen cloth inside of the pencil marks you made. Since the Velcro we had didn’t stick well to the linen we added some staples. Now you can place the linen onto the pipe and pull it as tight as you need to. The top of the box is now done.
 Now we will use the same method to apply the second and last piece of cloth to our box skeleton. Whichever side you choose to be the front of your lightbox is where we are working now. Cut two more pieces of longer Velcro and another four small squares and apply them in the same fashion as last time.
 To apply the rough/hooked side of the Velcro to the cloth we will use the same marking strategy as before. Make sure to hold the material tight around the box while marking. Once your markings are done, apply the Velcro to your material using the same technique as before.
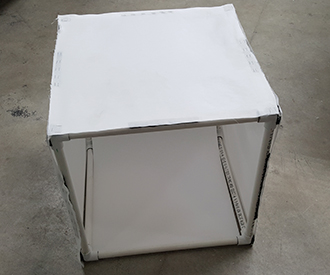
 Now attach one of the sides of your linen to one of the sides of your box, flip it over two times and then connect the last three pieces of Velcro. If the material isn’t tight enough you can twist the PVC pipe (since we didn’t cement it) inwards until your material is at the desired tightness.
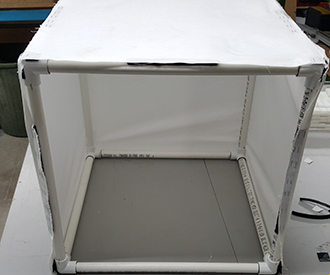
 Your collapsible lightbox is now complete. Now you just need to acquire the desired colored backdrop and you’re done! We cut down a white Bristol board and curved it to block the back and bottom of the inside of our lightbox.
There it is! Your first step to perfect product photography. The proof is in the photos below. The before and after photos were taken without any photo editing whatsoever. You can see the difference in even lighting and shadows. It's a truly effective piece of equipment.
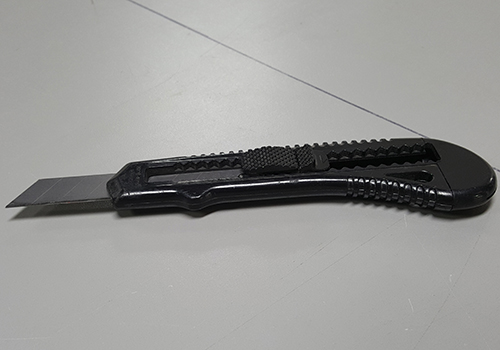
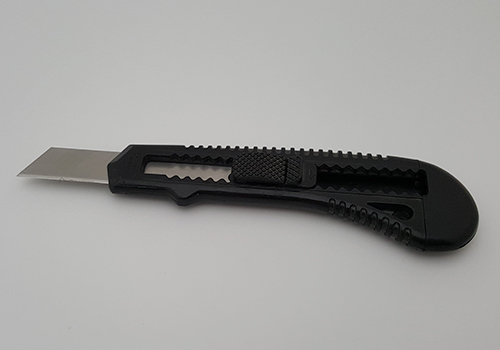 Utility Knife before and after lightbox
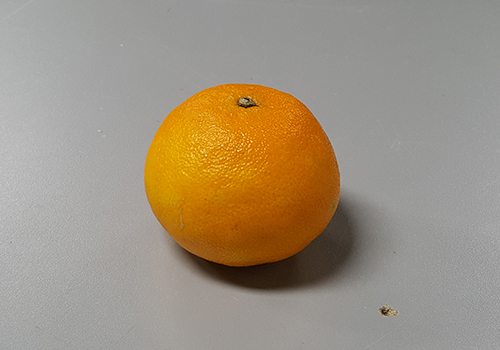
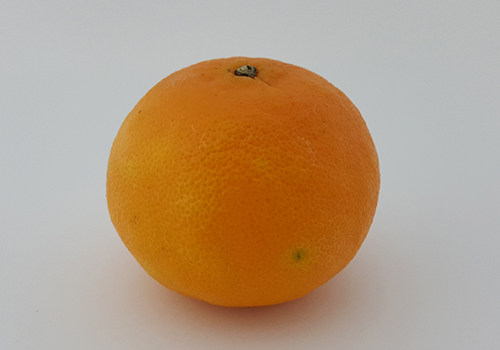 Clementine before and after lightbox
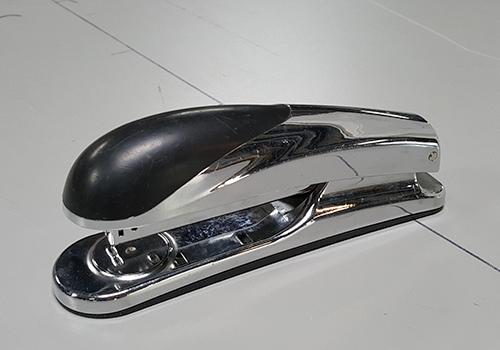
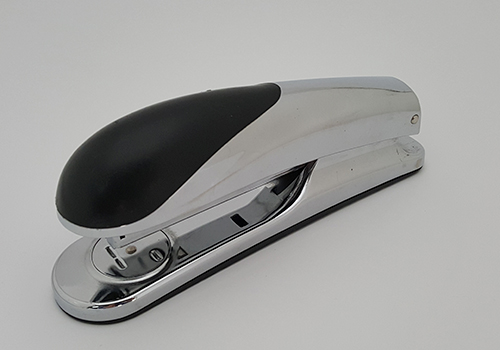 Stapler before and after lightbox
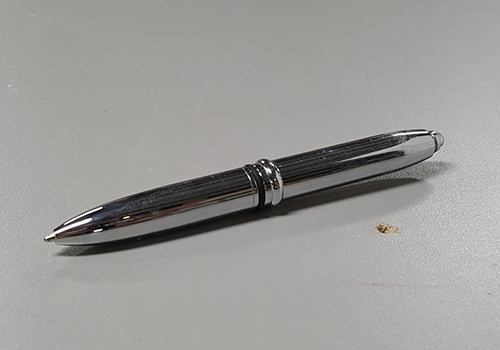
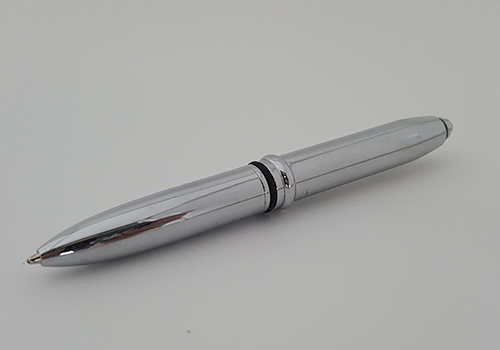 Pen before and after lightbox